Auto-deploy your generated static site to BunnyCDN.
Configuration
via UI
Input your BunnyCDN connection settings via the WP2Static > BunnyCDN menu.
via WP-CLI
wp wp2static bunnycdn options set name value
| Available option | Example input |
|---|---|
| bunnycdnAccountAPIKey | 9cff0fd9-7b86-4dad-be05-dabf5959e |
| bunnycdnStorageZoneName | mystoragezonename |
How it works
The BunnyCDN deployment add-on deploys your static site files to a BunnyCDN StorageZone and purges cache from the connected Pull Zone. The BunnyCDN Storage API is used to transfer files, currently limited via the API to 1 file at a time. WP2Static’s internal deploy cache is used to only transfer files changed between deploys.
A BunnyCDN Storage Zone allows files to be stored on BunnyCDN’s servers vs pulling from an origin server. A BunnyCDN Pull Zone sits in front of this Storage Zone, allowing static site hosting to work by routing requests to your custom domain to be served by files in the Storage Zone.
BunnyCDN takes care of distributing your static site across all it’s geographic regions for fastest load speeds to all your site’s visitors.
You can further optimize your site’s delivery using the Pull Zone settings available via BunnyCDN’s web UI, such as cache expiration times, number of datacentres, disabling cookies, image optimization, CSS/JS minification and more. Some of these options incur additional costs.
As we need the Account API Key to purge cache, we reduce the amount of options required for this add-on and use the API to find the Storage Zone Access Key when making requests to the Storage Zone API. Similarily, we detect the Storage Zone’s connected Pull Zone ID from the API. This just adds an extra API call behind the scenes vs requiring the user to input additional fields, like in the V6 BunnyCDN deployment option.
Configuration within WP2Static
There are only a few options you need to set in the plugin.
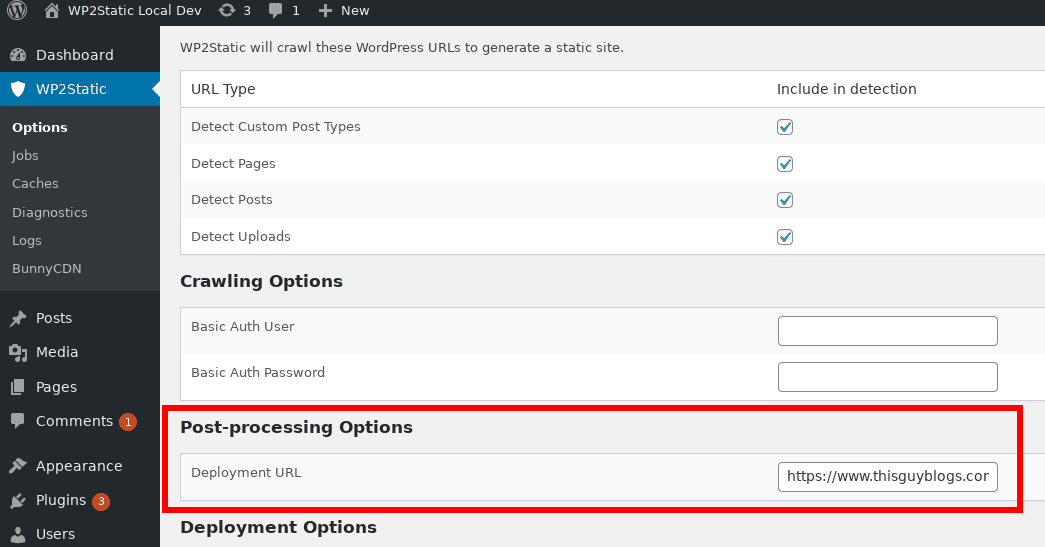
In WP2Static’s core “Options” menu (or via WP-CLI), set the Destination URL value to the final URL you plan to host your site on (ie, https://example.com.
In WP2Static’s BunnyCDN options, you’ll set the following:
- Account API Key
- Storage Zone Name
Configuration within BunnyCDN
Requirements for using this add-on with BunnyCDN:
- BunnyCDN Storage Zone
- BunnyCDN Pull Zone linked to Storage Zone
- BunnyCDN Account API Key
- Custom hostname added to Pull Zone
- CNAME DNS record from your domain to Pull Zone hostname
Step by step setup for a new BunnyCDN site
- In your BunnyCDN dashboard, navigate to Account and take note of your API key somewhere secure.
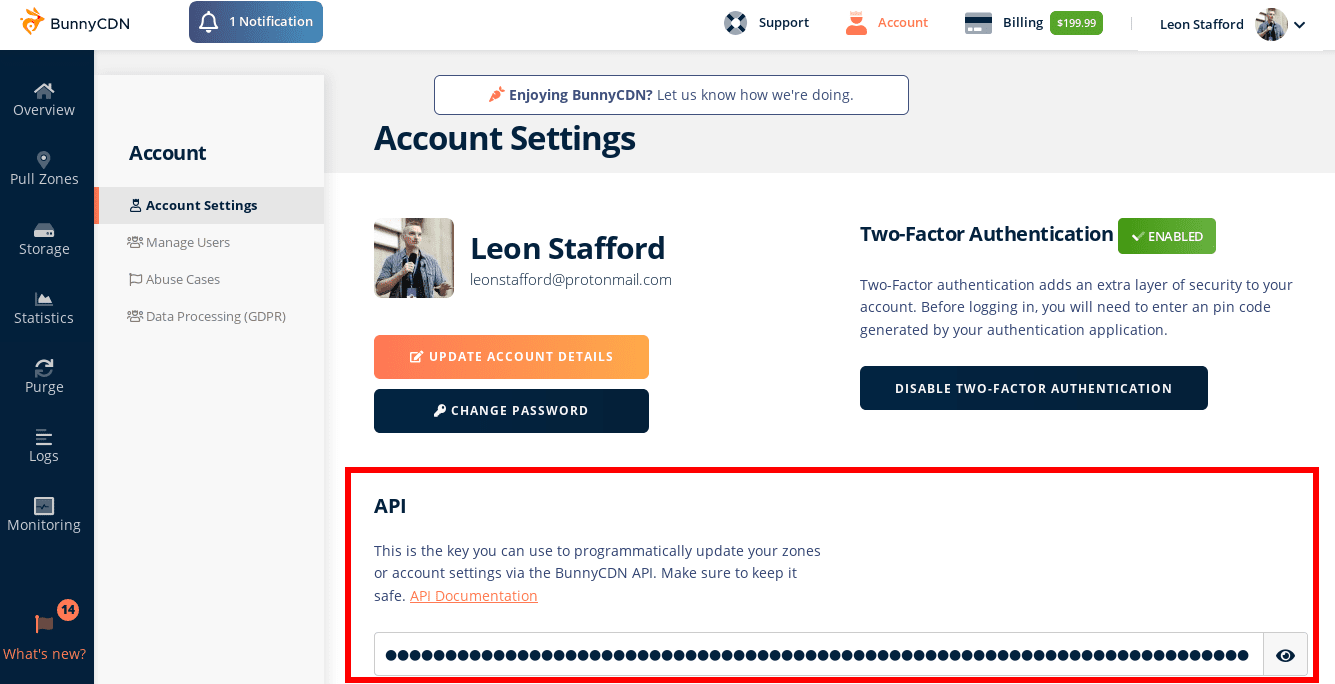
- Save this in WP2Static > BunnyCDN > Account API Key
- In your BunnyCDN dashboard, navigate to Storage Zones and create one.

- Save the Storage Zone’s name in WP2Static > BunnyCDN > Storage Zone Name
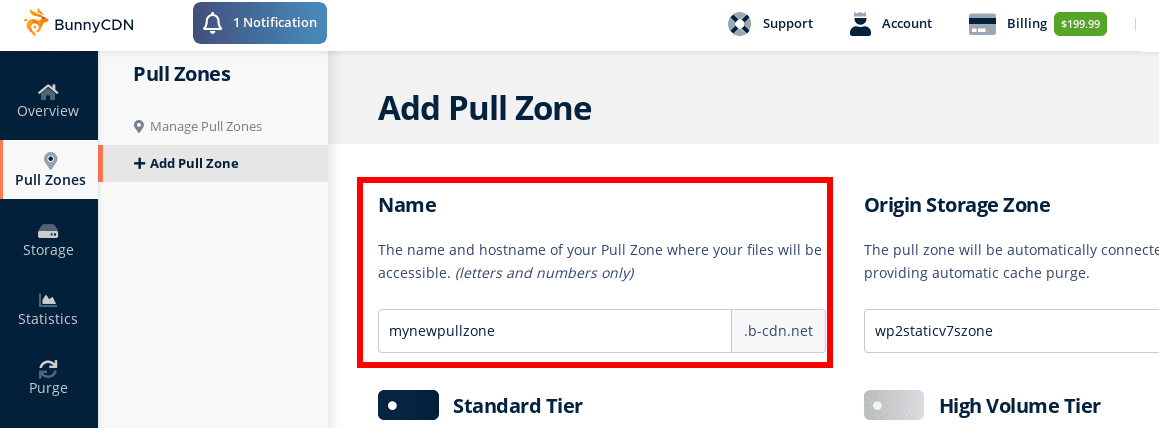
- Connect a new Pull Zone to your Storage Zone within BunnyCDN. From within your Storage Zone settings, choose “Connect Pull Zone”

- Enter any unique name for your pull zone and choose “Add Pull Zone” at bottom of screen.
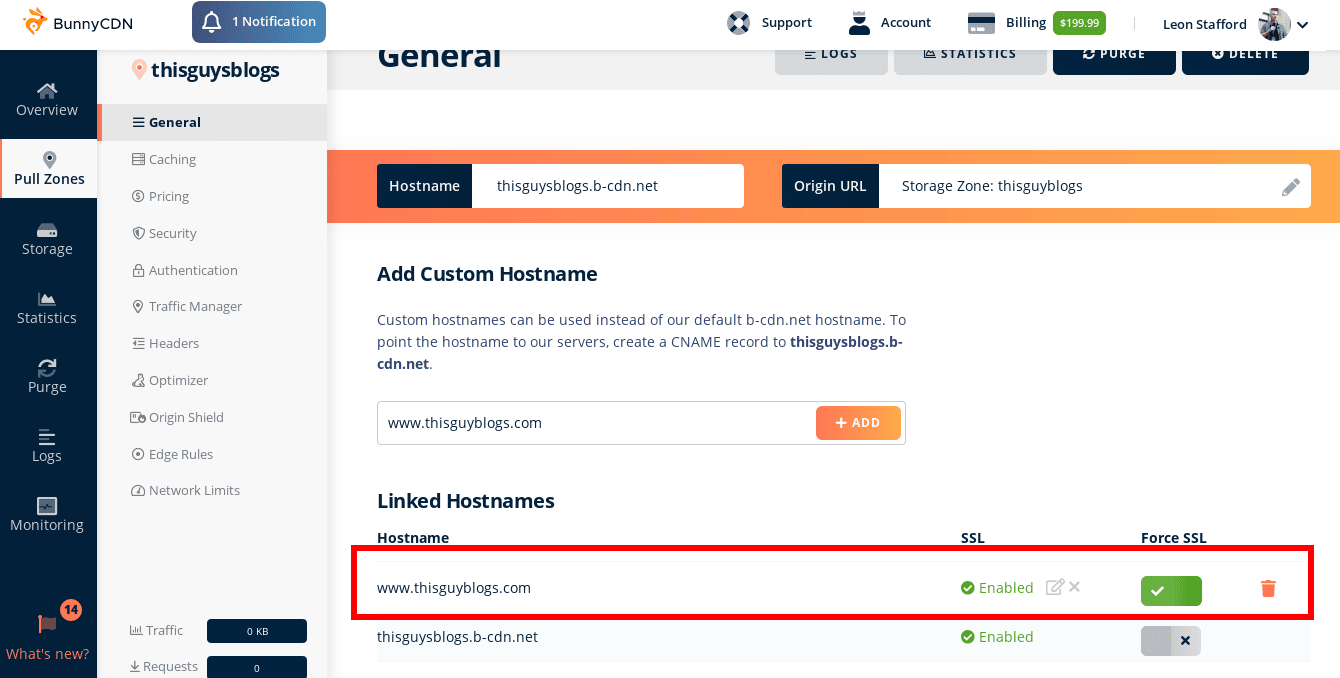
- Point your custom domain to BunnyCDN via the Pull Zone. Add your domain as a new hostname in your Pull Zone, adding the CNAME record in your DNS settings using the value provided by BunnyCDN. Ensure it’s all connected and then it’s recommended to use the Force SSL setting.
- Set your BunnyCDN site’s URL as your Destination URL within WP2Static options:
- You’re all setup! You can now deploy your site as usual via WP2Static (optionally clearing caches if you’ve previously done any deploys)
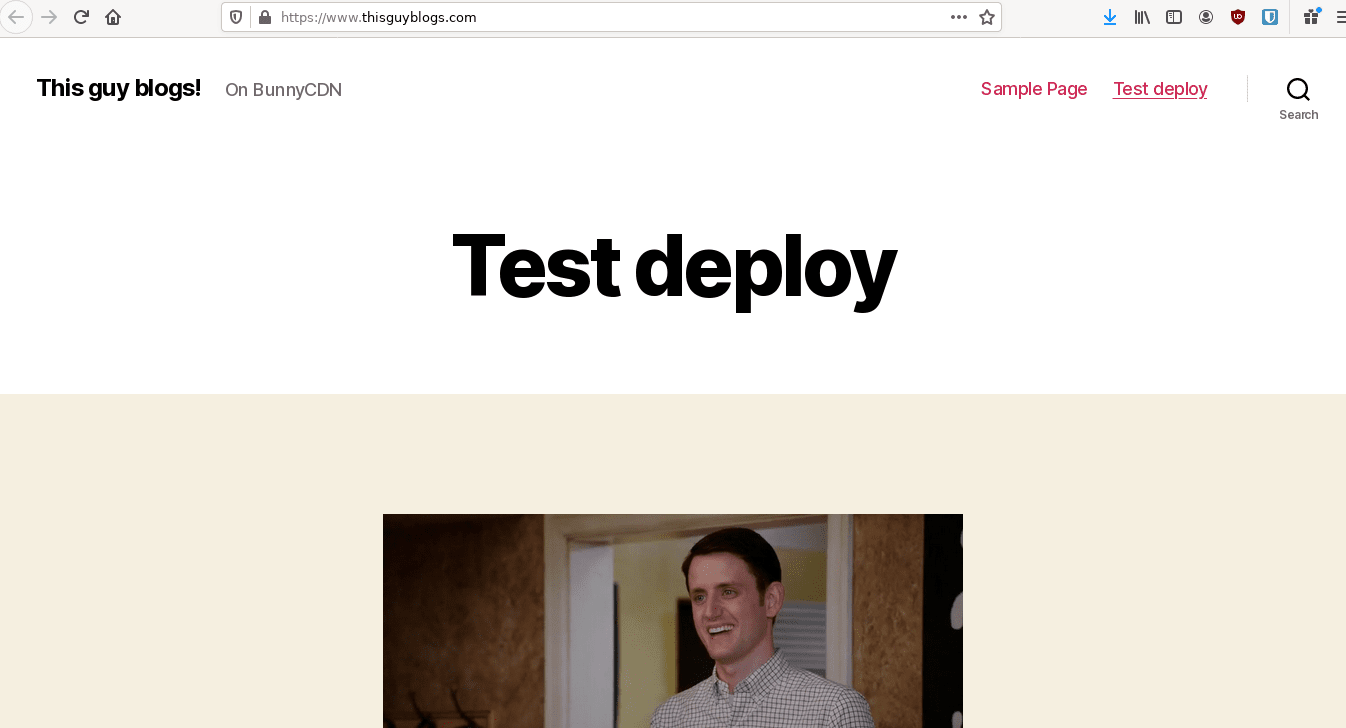
- After deploying, the custom hostname you used with the BunnyCDN Pull Zone should now show a static version of yoor WordPress site:
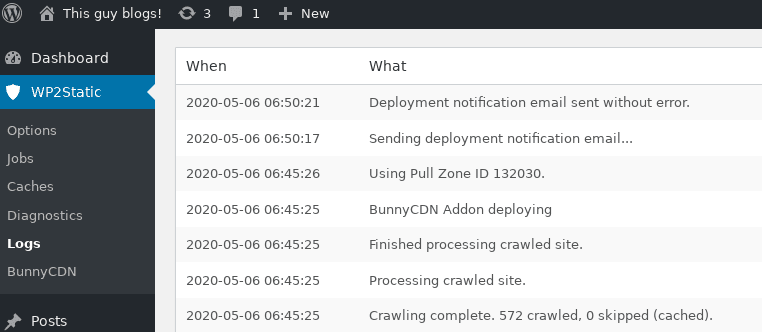
- A successful deployment should create Logs like this:
Managing your Storage Zone
To help me develop this add-on and troubleshoot when things go wrong, I’ve added the following WP-CLI commands to the BunnyCDN add-on:
wp wp2static bunnycdn storage_zone_files listprint out all filenames in the Storage Zone (this currently only prints items in the root directory, but thedeletecommand below will delete all files recursivelywp wp2static bunnycdn storage_zone_files countget total number of filenames in the Storage Zonewp wp2static bunnycdn storage_zone_files deletedelete all filenames in the Storage Zone (omitting--forcewill prompt for confirmation)
Troubleshooting
- check WP2Static’s Logs for any errors
- check Storage Zone / Pull Zone in BunnyCDN web UI
- use the WP-CLI commands above to check your Storage Zone files
- test your BunnyCDN API token:
- via CLI:
# lists contents of Storage Zone
curl --include \
     --header "Accept: application/json" \
     --header "AccessKey: STORAGE_ZONE_API_KEY" \
'https://storage.bunnycdn.com/STORAGE_ZONE_NAME/'- check your BunnyCDN API Key permissions (don’t use the read-only API Key)
Notes
BunnyCDN is a great CDN option, having a small, responsive and friendly team in Slovenia and offering edge locations where other providers don’t. Their web UI is quite easy to use. The Storage Zone API is unfortunately a bit lacking in ability to bulk upload files.