Auto-deploy your WordPress static site to Cloudflare Workers.
Configuration
via UI
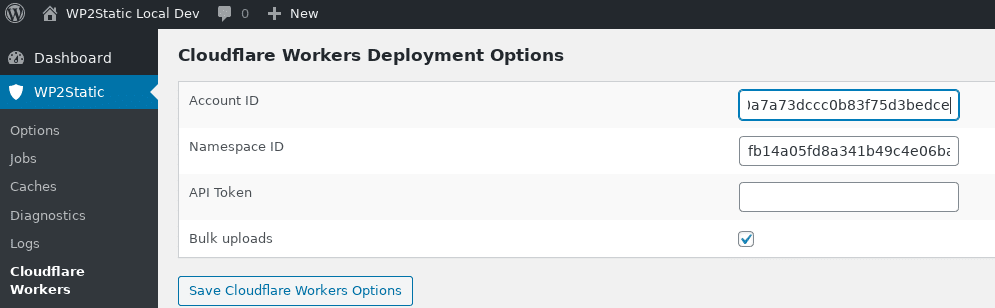
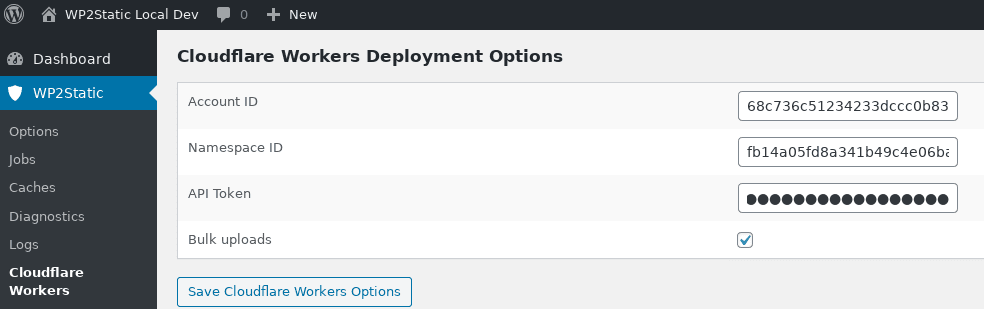
Input your Cloudflare Workers connection settings via the WP2Static > Cloudflare Workers menu.
via WP-CLI
wp wp2static cloudflare_workers options set name value
| Available option | Example input |
|---|---|
| accountID | 4c87e31c658e4feca573fe02fc225e8 |
| namespaceID | 683ba08756da4a9dadf0d6fe9022633 |
| apiToken | a3076fae62e5485aa083d51ba8ca037 |
| useBulkUpload | 1 |
How it works
The Cloudflare Workers deployment add-on deploys your static site files to a Cloudflare Workers KV namespace. It adds a key for each path (path), along with an extra key (path_ct) to store the content type. An example of 1 file uploaded, would result in 2 keys:
| Key | Value |
|---|---|
/ | <html><head><title>My WordPress Site... |
/_ct | text/html |
A Workers script (you need to setup) is used to read the files and correct content type and serve these to the user, caching at their nearest edge locations.
You’ll need to add a Route for the Worker for it to run on the intended domain/subdomain.
The resulting deployment will function similar to if you deploy with Cloudflare’s Wrangler CLI tool.
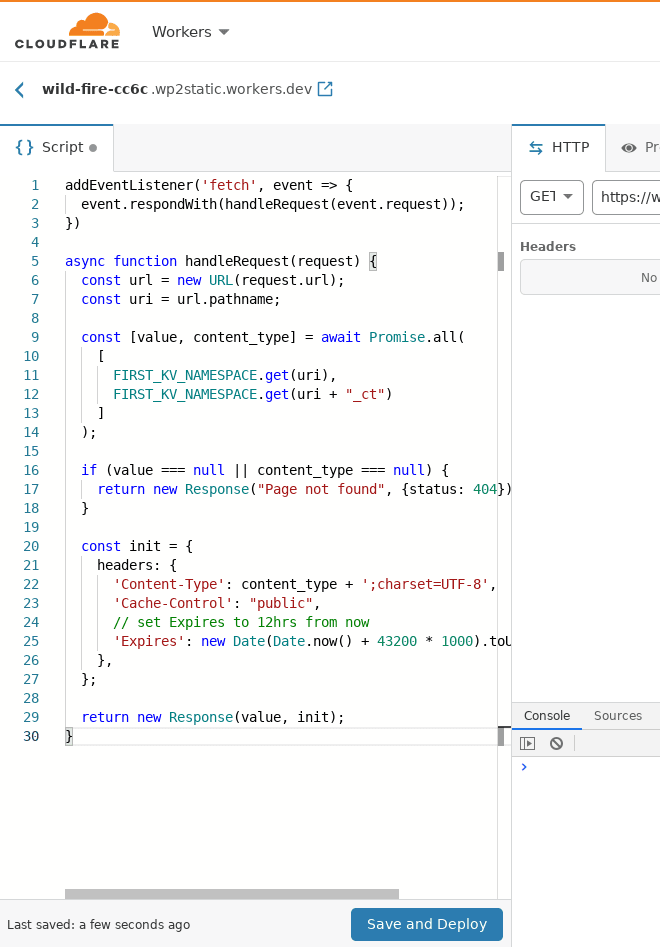
An example script for Workers to use the KV store:
addEventListener('fetch', event => {
  event.respondWith(handleRequest(event.request));
})

async function handleRequest(request) {
  const url = new URL(request.url);
  const uri = url.pathname;

  const [value, content_type] = await Promise.all(
    [
      FIRST_KV_NAMESPACE.get(uri),
      FIRST_KV_NAMESPACE.get(uri + "_ct")
    ]
  );

  if (value === null || content_type === null) {
    return new Response("Page not found", {status: 404});
  }

  const init = {
    headers: {
      'Content-Type': content_type + ';charset=UTF-8',
      'Cache-Control': "public",
      // set Expires to 12hrs from now
      'Expires': new Date(Date.now() + 43200 * 1000).toUTCString(),
    },
  };

  return new Response(value, init);
}
Configuration within WP2Static
There are only a few options you need to set in the plugin.
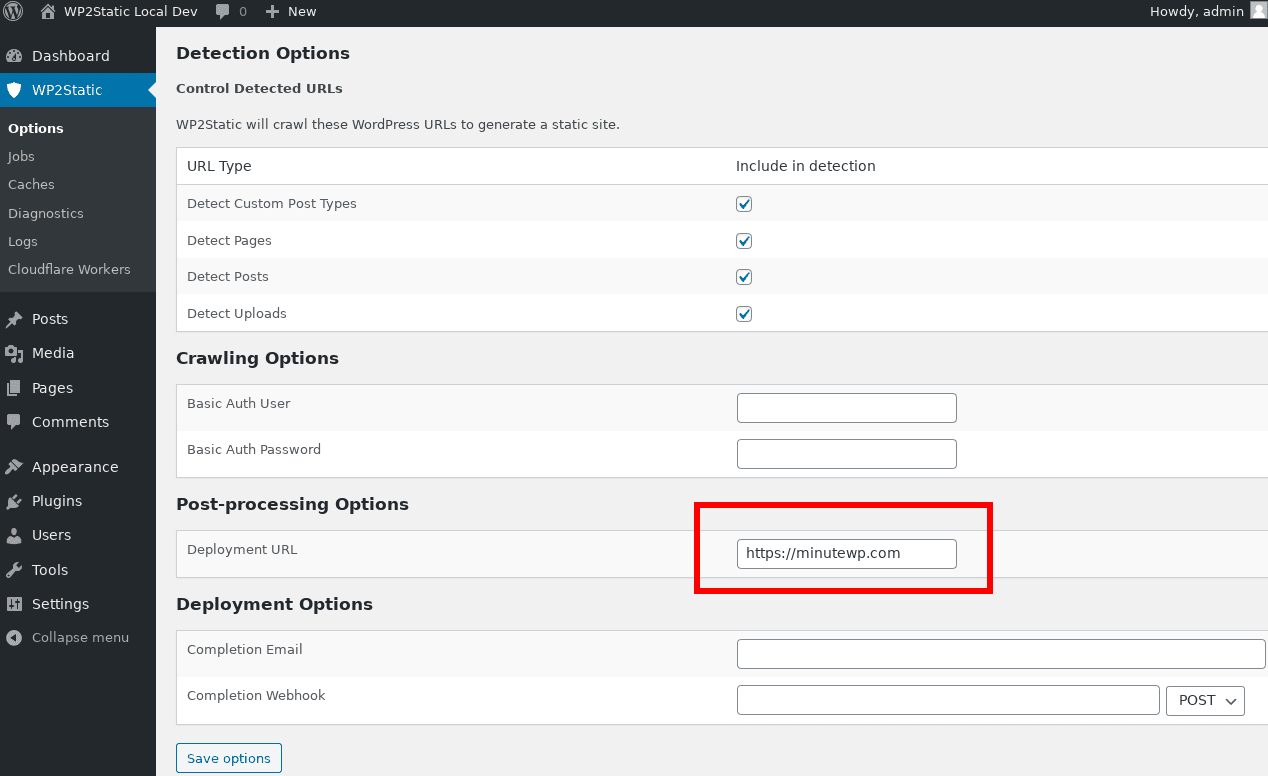
In WP2Static’s core “Options” menu (or via WP-CLI), set the Destination URL value to the final URL you plan to host your site on (ie, https://example.com, not the *.workers.dev subdomain (unless you want to use that during testing deployments).
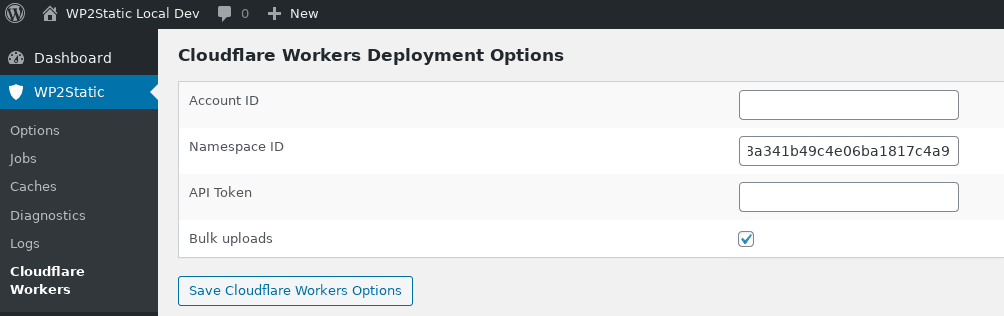
In WP2Static’s Cloudflare Workers menu, you’ll set the Account ID to your Cloudflare account ID you can find within your URLs, ie if visiting a Workers admin URL, it will be the https://dash.cloudflare.com/ACCOUNT_ID/workers ACCOUNT_ID hash.
Set your Namespace ID to your target namespace’s ID as shown in the Worker KV page.
Set your API Token to a token you create via My Profile > API Tokens.
Bulk uploads option is on by default. This greatly speeds up the transfers to Cloudflare, but if you need to upload each file one by one to overcome some network limitations, you can disable this.
Configuration within Cloudflare
Requirements for using this add-on with Cloudflare:
- $5/month KV Unlimited plan
- a domain’s DNS managed by Cloudflare
- a Worker with a function like above and a Route set to a DNS record for your domain (ie, a subdomain or naked domain)
- a Workers KV namespace
- a KV Namespace Binding in your worker to the KV namespace (ie, in this doc, we’ve used
FIRST_KV_NAMESPACE)
Step by step setup for a new Workers site
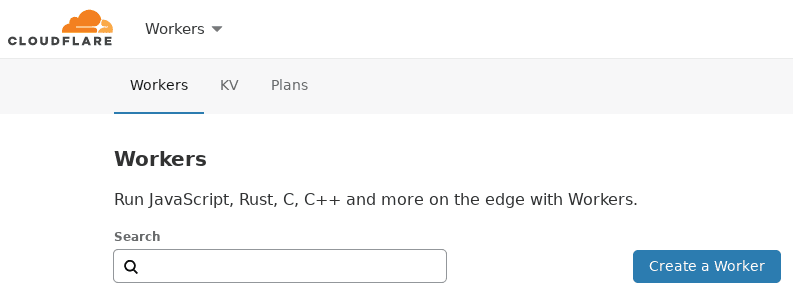
- In your Cloudflare dashboard, navigate to Workers, choose “Create a Worker”
- paste the example script on this page into the editor screen shown and choose “Save and Deploy”:
- return to the Workers menu and “Rename and Deploy” your newly created Worker to something more mmorable:

This gives you your internal *.workers.dev subdomain.
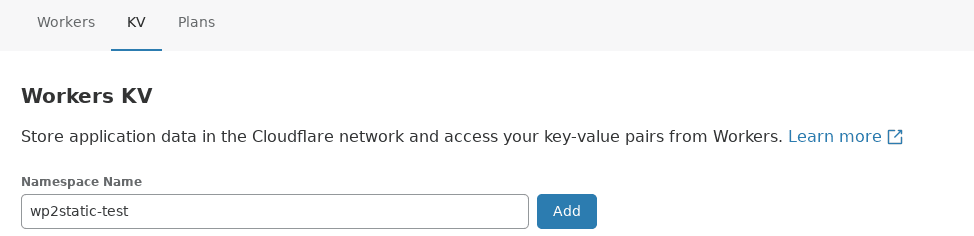
- setup a new KV Namespace
Navigate to KV page “Add” a new Namespace using a name of your choosing:
- copy your KV namespace’s ID and paste into the Cloudflare Add-on’s options:

- copy your Cloudflare Account ID and paste into the Cloudflare Add-on’s options:

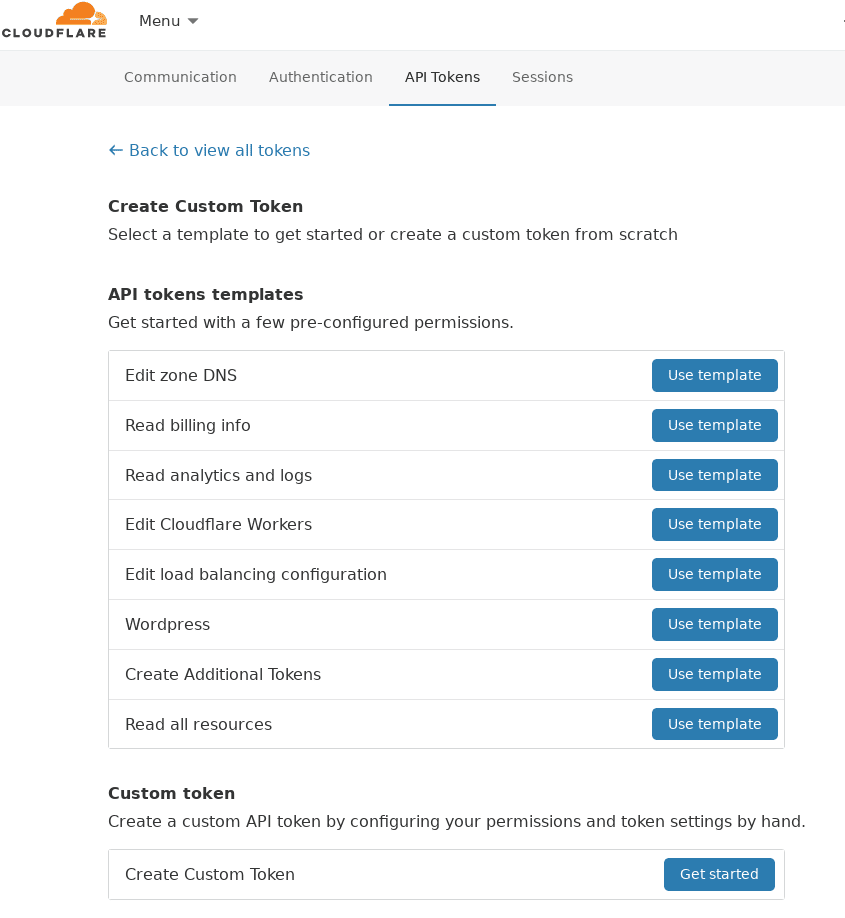
- Navigate to your Profile > API Tokens > “Create Token” > “Create Custom Token” > “Get started”
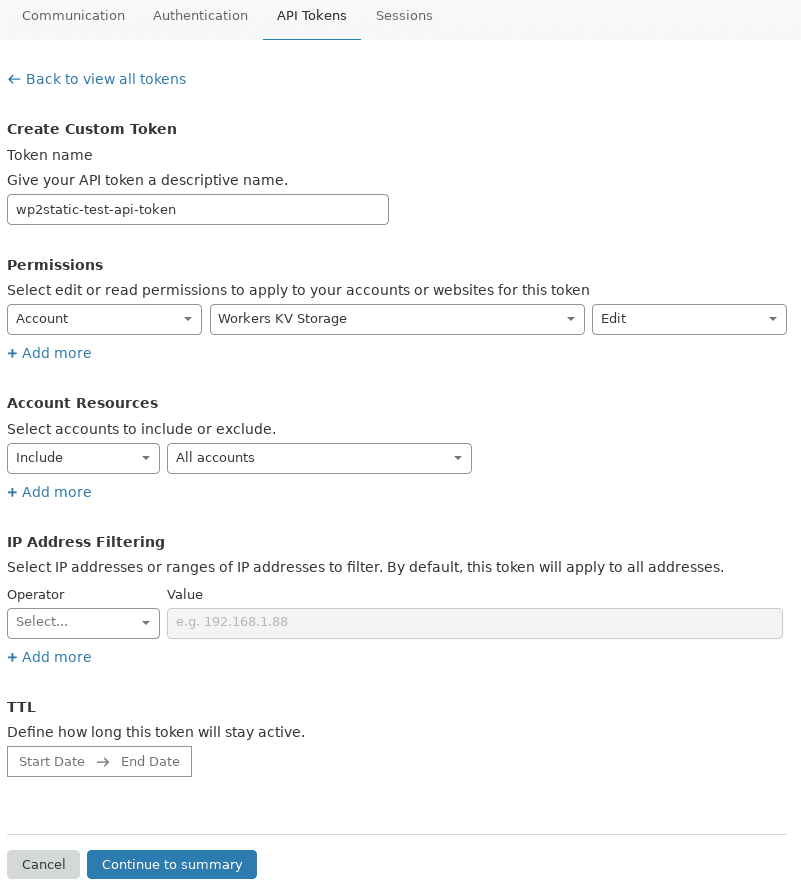
- Set your API Token’s names and the Account:Workers KV Storage:Edit permissions
You can leave the default Account Resources set to Include:All accounts or narrow the permissions to your needs
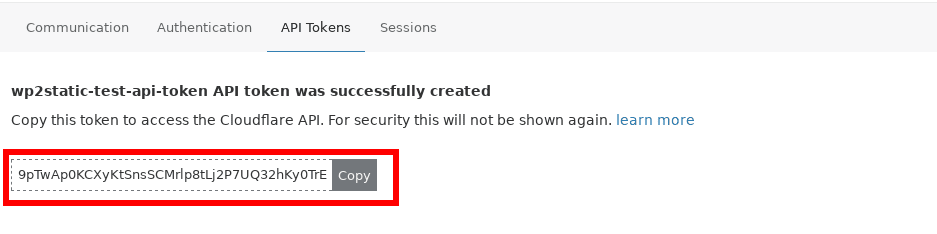
- Proceed to the confirmation screen and choose “Create Token”
- copy your Cloudflare API Token and paste into the Cloudflare Add-on’s options:
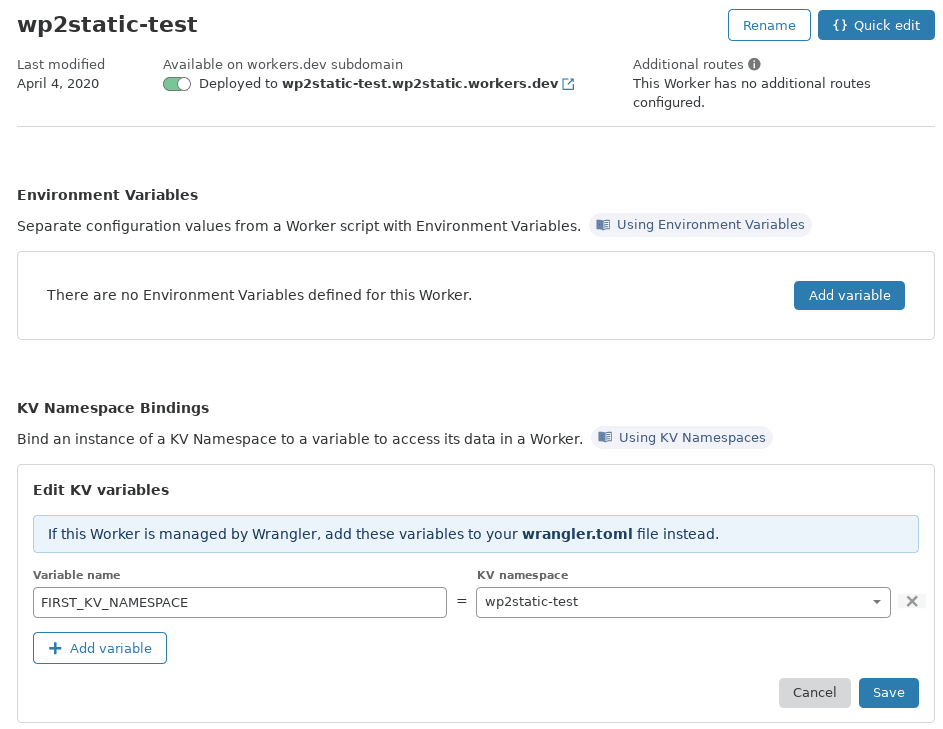
- Add KV Namespace Binding to your Worker. Workers > YOUR_NEW_WORKER > “Add variable”
- Set the Variable name to
FIRST_KV_NAMESPACEand choose your new Worker from the KV Namespace menu:
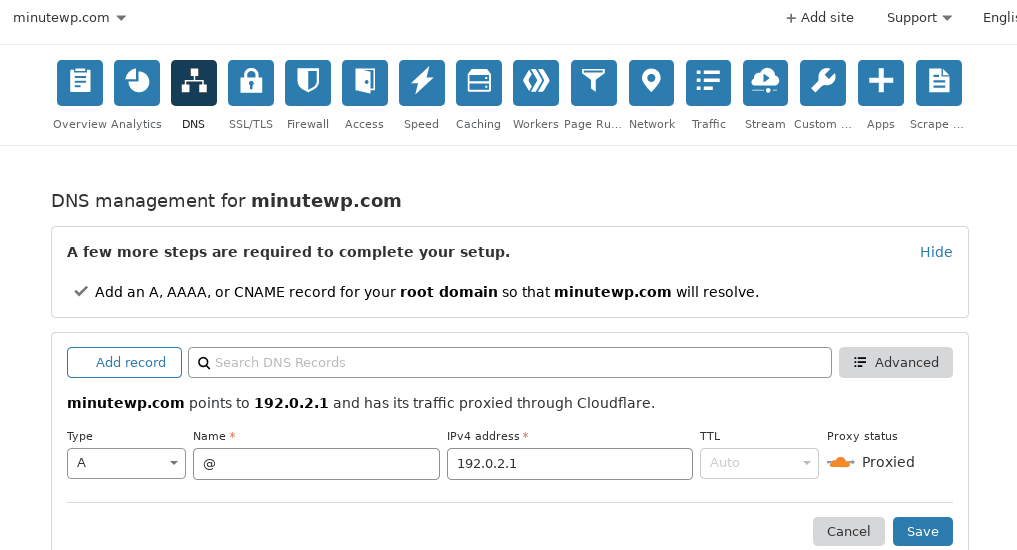
- Add DNS entry to point to Workers. For a naked domain, add an A record for
@to192.0.2.1with Proxy status “Proxied”
This will resolve the record to Cloudflare, allowing the Worker to server requests.
For a subdomain, use the same approach, but use the subdomain, ie www instead of the @.
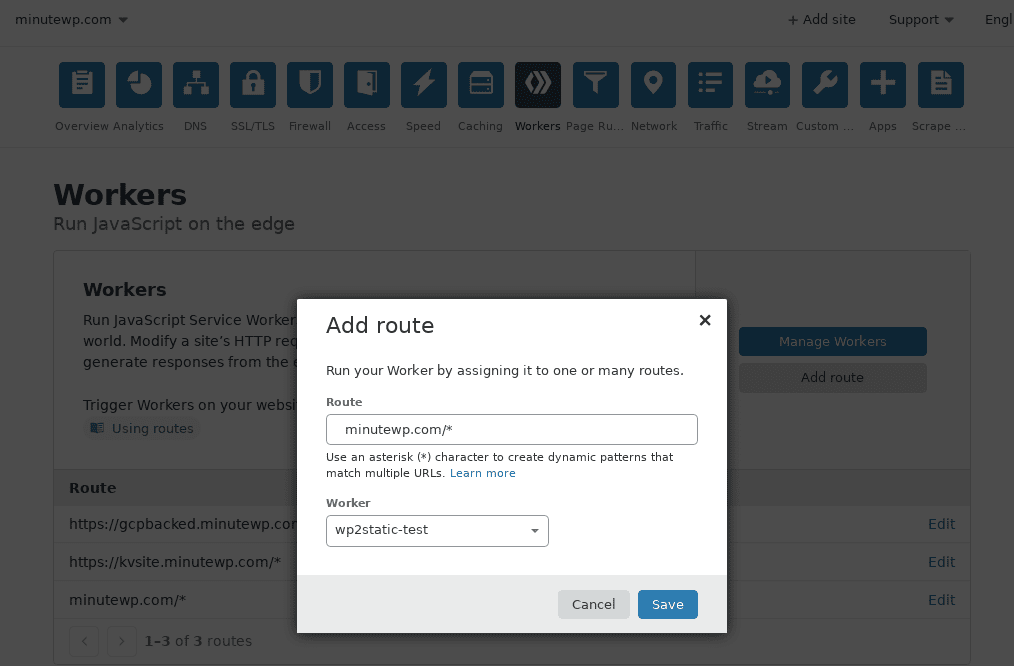
- Add a Route
example.com/*, choosing your newly created Worker from the list:
If you want to have www redirect to your naked domain, you can also add a CNAME record from www to example.com, but you may need to add an additional route or code to the Worker script to handle the redirect.
- Set your Cloudflare site’s URL as your Destination URL within WP2Static options:
- You’re all setup! You can now deploy your site as usual via WP2Static (optionally clearing caches if you’ve previously done any deploys)
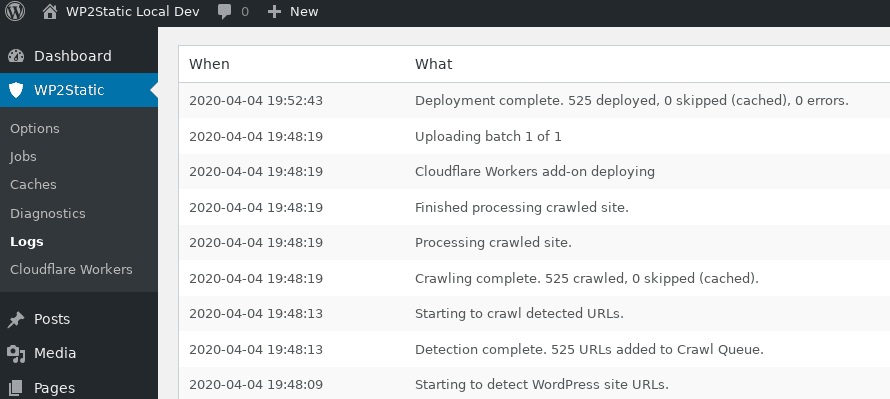
- A successful deployment should create Logs like this:
Managing your KV namespaces
Cloudflare’s web interface doesn’t currently allow for easily managing KV data.
To help me develop this add-on and troubleshoot when things go wrong, I’ve added the following WP-CLI commands to the Cloudflare Workers add-on:
wp wp2static cloudflare_workers keys listprint out all keys in the namespacewp wp2static cloudflare_workers keys countget total number of keys in the namespacewp wp2static cloudflare_workers keys deletedelete all keys in the namespace (omitting--forcewill prompt for confirmation)
If you’ve been testing deploys to a KV namespace and filled it with a lot of bad or otherwise unneeded keys, it’s faster to create a new namespace for use in WP2Static and deleting the old namespace.
Troubleshooting
- check WP2Static’s Logs for any errors
- check webserver/PHP’s error logs on server
- check keys in KV namespace in Cloudflare
- use the WP-CLI commands above to check your namespace’s keys and values
- test your Cloudflare API token:
- via CLI:
curl -X GET "https://api.cloudflare.com/client/v4/user/tokens/verify" \
     -H "Authorization: Bearer YOURAPITOKEN" \
     -H "Content-Type:application/json"
- check your Cloudflare API token’s permissions (write to KV for correct account/zone)
Notes
You can use the built-in Brotli compression Cloudflare offers without needing to set additional headers in your Workers script. If you’d like to see options to send gzipped data from WP2Static and set gzip headers in your Workers script, let us know.