WP2Static offers flexible workflows for static site generation, including fully automated workflows you can setup via the UI. These utilize a Job Queue, to which we can manually or automatically add any or all of these Job types: detect, crawl, post_process and deploy.
For workflows you want to control more from the command line/external scripts, see our WP-CLI docs.
Why a Job Queue?
Consider an ideal WP2Static workflow:
- update some content
- content auto-updates on the production static site
Even though we have various caching techniques to make crawling and deploying fast, if everytime we updated a page/post, we had to wait for the whole WP2Static workflow to complete before doing more editing, it would be quite frustrating!
By queuing Jobs and controlling the schedule at which the Job Queue is processed, we can enjoy uninterrupted content editing in WordPress and an eventually consistent production (or staging) update.
The other benefit of a Job Queue is that it moves all the execution to the background – removing the need to keep the browser open as in older versions of WP2Static. This does come with an increased requirement for large sites – that your webserver and PHP configurations support long-running tasks. The performance benefits for large sites are worth it and most small sites will not need to change anything on their server as the workflow will complete before hitting any timeout limits.
Job options
All Job options can be configured via the WP2Static > Jobs UI or via WP-CLI commands.
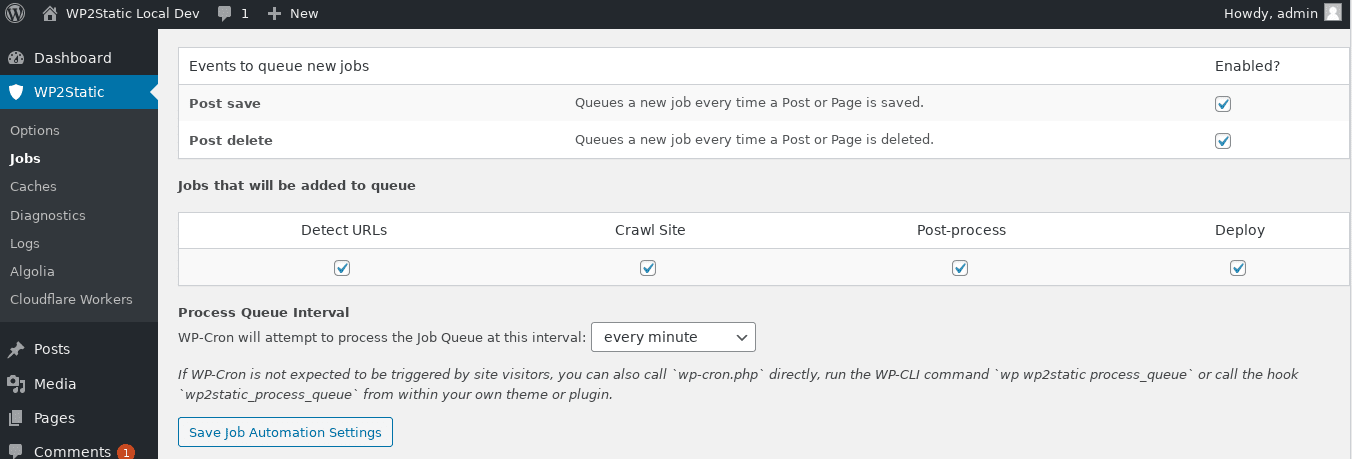
Events to queue new Jobs
Here, you can select which WordPress events will add new Jobs to the Job Queue, such as creating/updating/deleting a Post or Page.
Usually, these events will also be clearing related URLs from the Crawl Cache so that the latest versions of that content will be crawled/processed/deployed.
Jobs that will be added to queue
Each Job type selected here will be added whenever new Jobs are manually or automatically added to the Job Queue. Usually, keeping all options selected is fine.
Process Queue Interval
How do I get WP2Static to “do something”?
This is the least intuitive area for new users and I’ll keep in mind ways to make this less painful.
The answer is usually related to this Process Queue Interval option. This creates a new schedule for WP-Cron, WordPress’s internal task scheduler. By setting this to 1 min, for example, WordPress will run the WP2Static function that processed the Job Queue at most every minute.
If WP-Cron is disabled on your WordPress site, nothing will happen even if you set this interval.
WP-Cron is a useful feature of WordPress, but it’s more of a workaround to limited hosting environments than an ideal scheduling tool.
WP-Cron events need some kind of visitor activity in your WordPress site to run. This means, that even if you set your schedule to every 1 minute, if you’re not in your Admin screen and there are no visitors on your site (unlikely for your non-public development WordPress site!), then the task won’t run until the next visitor activity, however long in the future that may be.
Preferred methods for running tasks in WordPress, including those registered as WP-Cron tasks, are to disable WP-Cron from running as usual and either:
- requesting the
/wp-cron.phpURL (from your own server’s CRON or using a 3rd party service) - running the
wp wp2static process_queuecommand directly from your CRON or other script
If you are using WP-Cron’s scheduling, the WP Crontrol plugin can help you to visualize what’s going on and allow for manually triggering any scheduled tasks.
Be sure to hit the “Save Job Automation Settings” button after making changes on the Jobs screen.
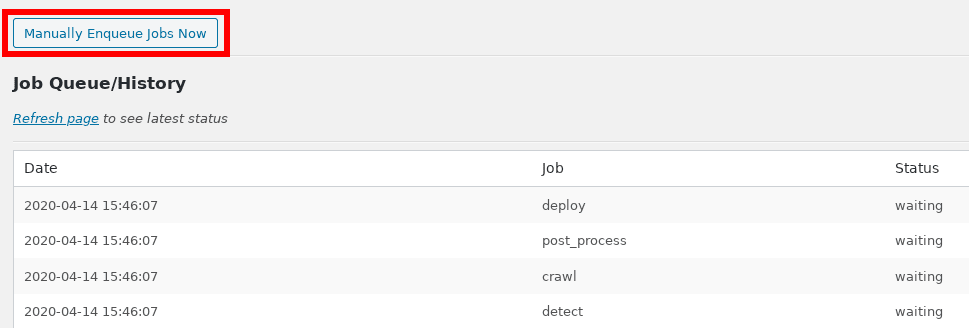
Managing the Job Queue
Manually enqueuing a Job
To manually add a new Job to the queue, hit the “Manually Enqueue Jobs Now” button. It should then appear in the Job Queue/History at the bottom of the Jobs screen.
Clearing the Job Queue
At the bottom of the Jobs screen, hit the button “Delete all Jobs from Queue”. This will clear all completed and pending Jobs, as well as any that are partially completed or frozen. In the case that you’ve deleted in-progress Jobs from the queue, it’s a good idea to then go to the Caches screen and clear all caches to avoid unexpected results.
Clearing an in-progress Job won’t necessarily halt that job before it completes. For a very large site, to force kill any in-progress Jobs, the only guaranteed way is to restart your webserver.
Bypassing the Job Queue completely
WP2Static’s WP-CLI commands allow you to directly execute the detect, crawl, post_process and deploy functions. These don’t use the Job Queue at all and may be your preferred way to use WP2Static.
It’s also possible to run most if not all WP2Static functions programmatically, via your own theme, plugin or custom code. See Extending WP2Static for ideas.
FAQs
I added a bunch of Jobs, but I only see one new one ‘waiting’
If you’ve updated a Post 3 times since your last deployment, there’s no need to deploy those 3 different versions when you only want the most recent changes reflected on your live site.
If you’ve set your Job Queue processing schedule for every 5 minutes and you make those 3 changes in the 5 mins before the next schedule is set to run, WP2Static will “squash” any Jobs of the same type in the Job Queue, keeping just the most recent one of the same type. This reduces the load on your server and keeps the Job Queue clean.